Many Kenyan businesses accept payments using the PesaPal payment gateway because of its reliability and ease of use. Learn all you need to know to setup and use PesaPal payment gateway in Kenya for your website with no effort.
Setup PesaPal payment gateway in Kenya
1. Sign up for a PesaPal Merchant Account
Go to the PesaPal website and Sign Up.
Fill in accurately the required information to create a merchant account. This includes your business details, contact information, and banking details.
2. Verification and Approval
PesaPal will review your application and contact you for any additional information or documentation required.
Once your application is approved, you will receive login credentials and instructions for accessing your PesaPal merchant account.

3. Integrate PesaPal with Your Website
PesaPal provides various integration options, depending on your website platform or development preferences.
Visit the PesaPal Developer Portal to access your platform’s integration documentation and resources.
Follow the integration instructions to incorporate the PesaPal payment gateway into your website. This typically involves adding code snippets or plugins to your website’s checkout or payment pages.
4. Configure Payment Settings
Log in to your PesaPal merchant account dashboard using the credentials provided.
Navigate to the settings section and configure your payment preferences, such as supported currencies, payment options, and notification settings.
Ensure that you provide accurate information for payout settings, including your bank account details for receiving funds from PesaPal.
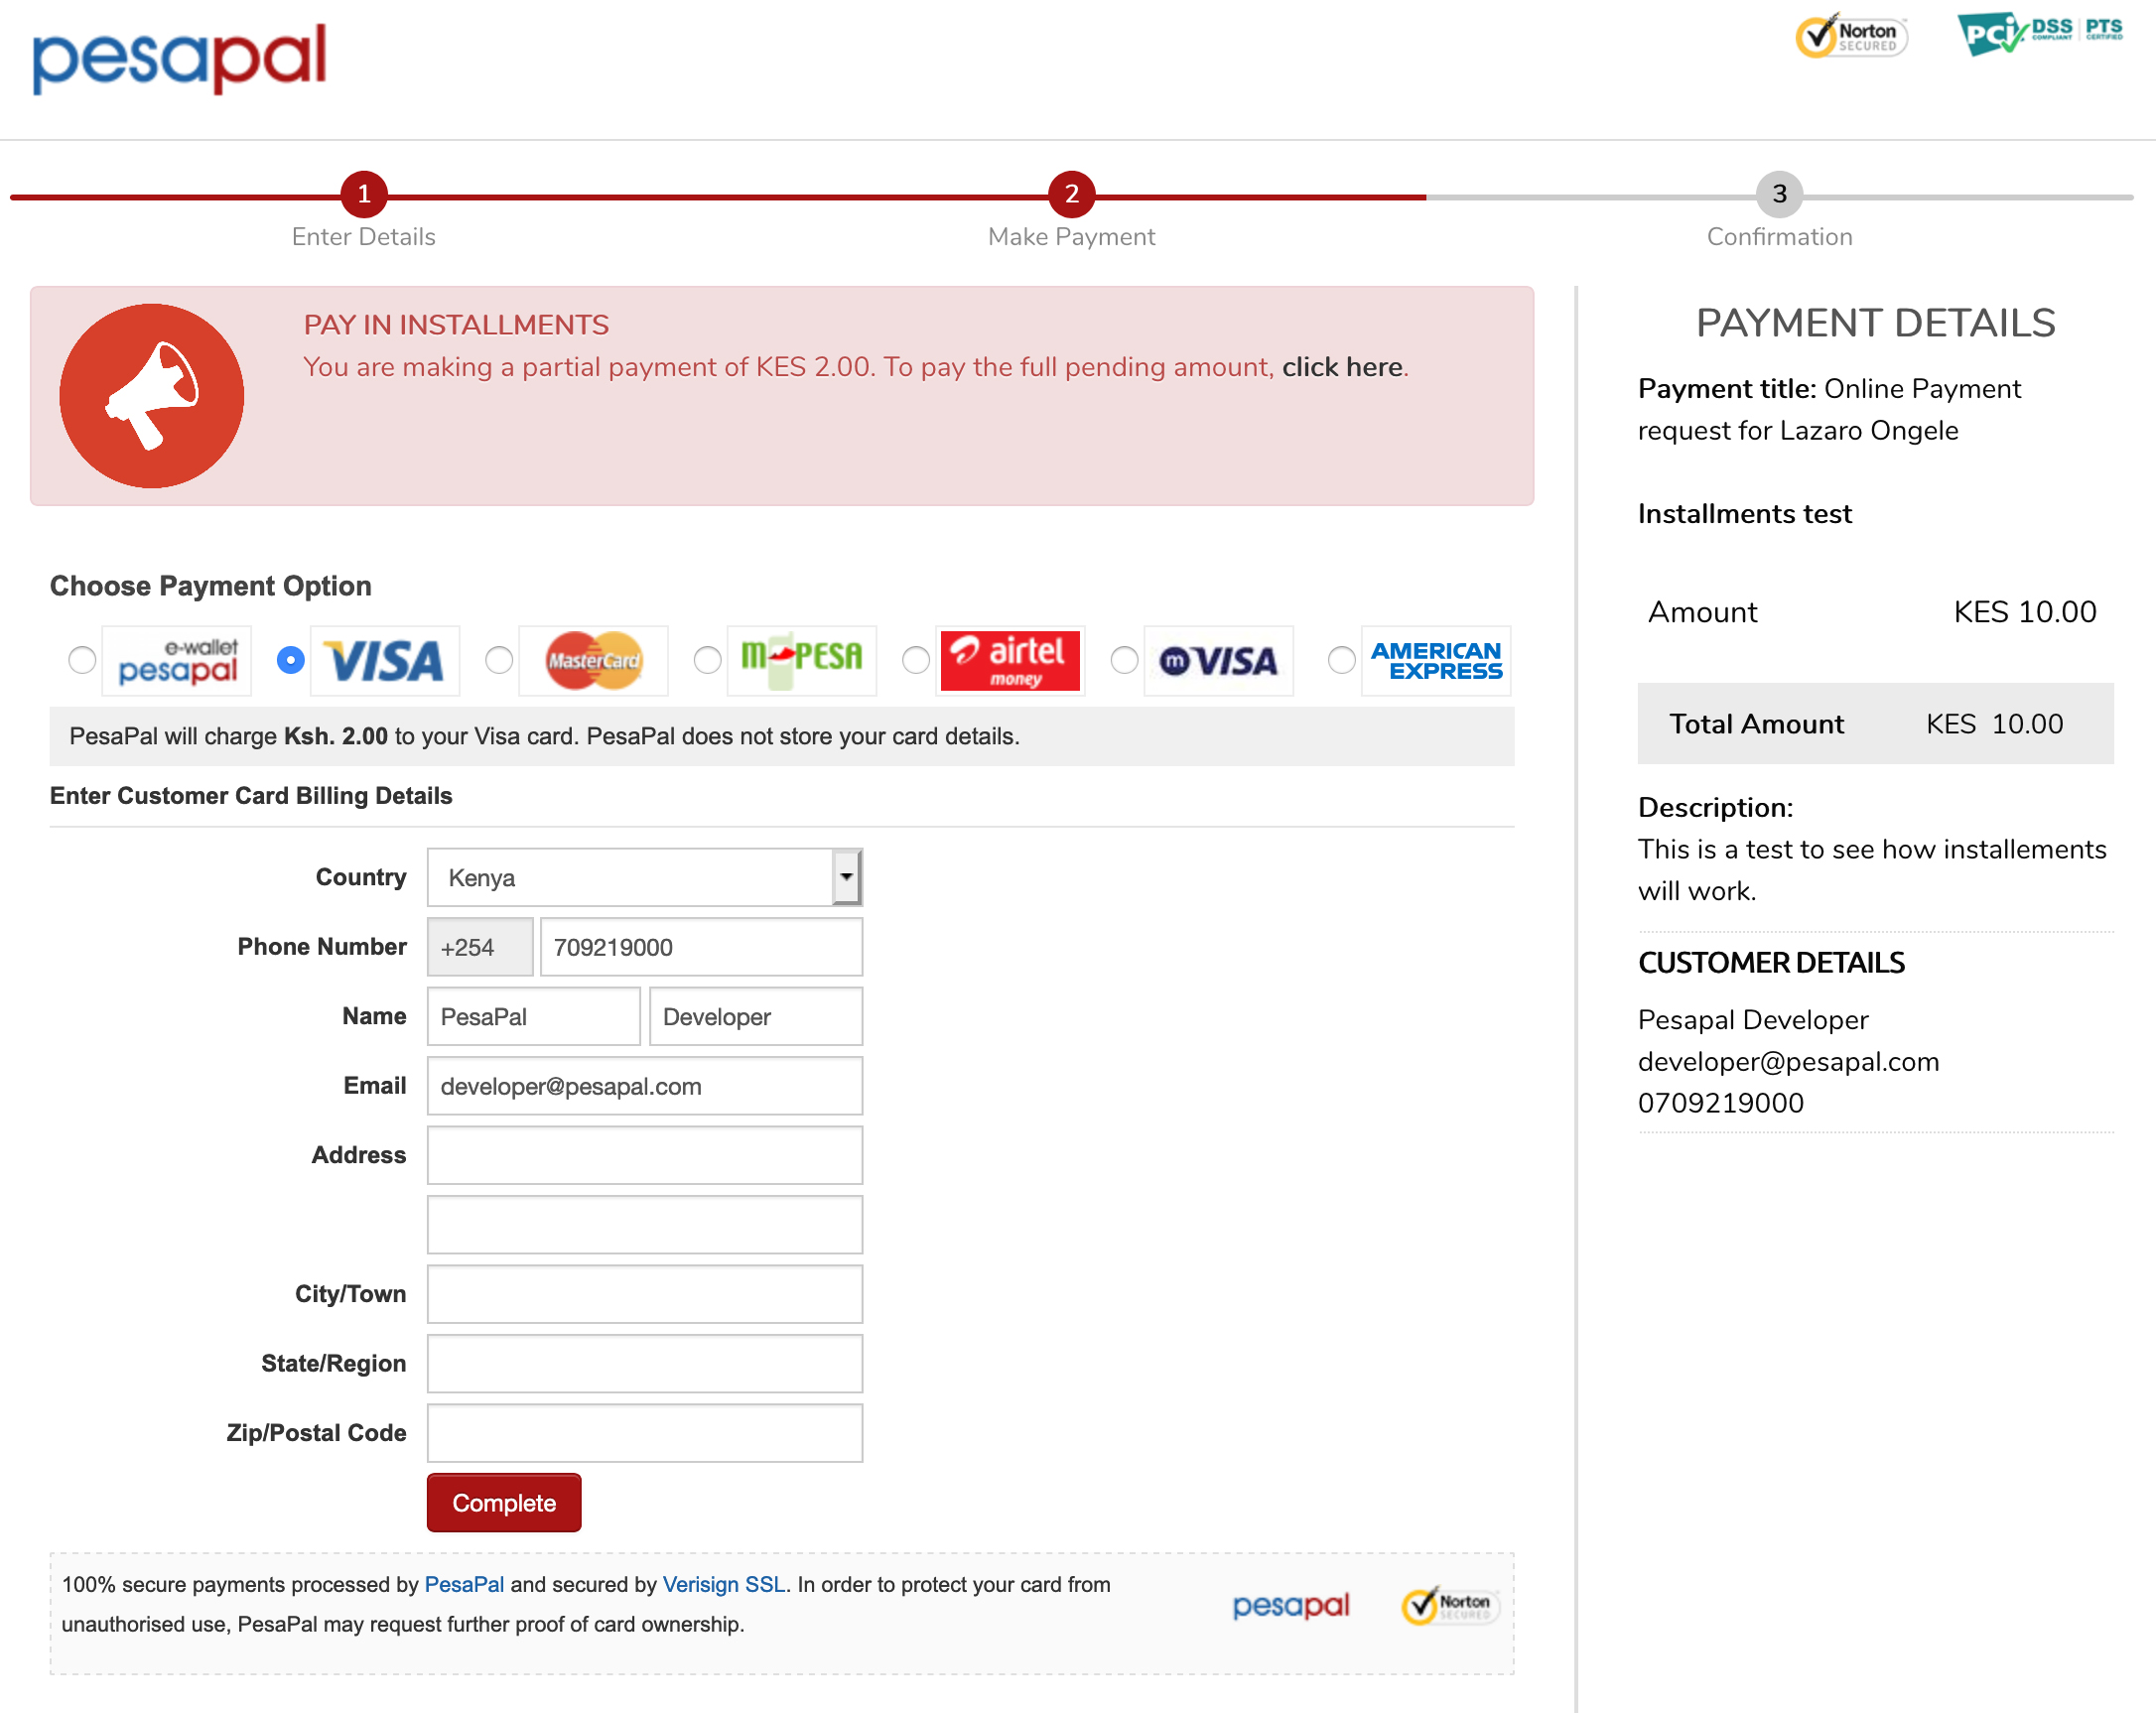
5. Test Transactions
Before going launching, testing the payment integration to ensure it functions correctly is crucial.
PesaPal provides a sandbox environment for testing transactions without using real money.
Refer to the integration documentation for instructions on how to set up and conduct test transactions using the sandbox environment.
6. Launch
Once you have completed the necessary testing and are satisfied with the integration, contact PesaPal to request the switch to the live production environment.
PesaPal will review your request, and upon approval, you will receive confirmation that your PesaPal payment gateway is live and ready to accept real transactions.
This step marks the official launch of your online payment solution, allowing your customers to make secure and convenient payments through PesaPal.
7. Monitor and Manage Transactions
Regularly monitor your PesaPal merchant account dashboard to track transactions, view reports, and manage payments.
You can access various tools and features within the dashboard to reconcile transactions, generate invoices, and handle refunds or disputes.
Conclusion
Following the above steps, you can successfully setup and use the PesaPal payment gateway in Kenya. Integrating this secure and convenient payment solution into your website empowers your business to accept online payments seamlessly, enhancing customer satisfaction and driving growth in the digital economy.
Read also, How to Start a Website in Kenya using Wix
Read also, How to Start a Website in Kenya Using Drupal
Read also, How to Setup and Manage a Database for a Kenyan Business